Monitor Settings
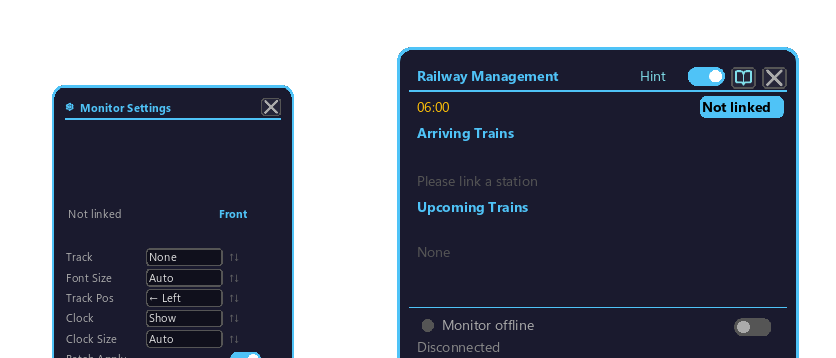
The popup opened by the "Settings" button on the Railway Management Block. Configure monitor font size, track number position, clock display, batch apply, and more.
How to open
- Right-click the Railway Management Block to open its GUI.
- Click the "⚙ Settings" button on the monitor row, and this settings popup appears on the left side of the dialog.
- Click the "⚙ Settings" button again to close it.
Operation basics
- Numbers (track number / font size) are increased/decreased by hovering the cursor over the value and using the "mouse wheel". There are no + / − buttons.
- Toggles (track display position / clock display) alternate (left/right, shown/hidden) when you click the item (scrolling over the item toggles it too).
Settings
| Item | Range | Operation | Use |
|---|---|---|---|
| Track number | 0 – 99 (0 = none) | Hover value → wheel | Track shown in train info |
| Track font size | 0 = auto, larger from there | Hover value → wheel | Text size |
| Track display position | Left / Right | Click to toggle | Left/right within the header |
| Clock display | Shown / Hidden | Click to toggle | Show current time in header |
| Clock font size | 0 = auto, larger from there | Hover value → wheel | Clock text size |
Batch Apply toggle
Clicking the "Batch Apply" toggle in the popup to turn it ON applies the same settings in bulk to all Railway Management Blocks in the same network (= belonging to the same station group created with the Station Range Tool).
- To unify the display across a whole line: turn it ON, then edit each value
- To set values individually per station / per face: leave it OFF
Two-sided display
The back side (opposite-direction platform) can be treated as a separate setting. Click the "↻ Front/Back Toggle" button in the popup to switch between front / back, then edit each value with the wheel / click as above. Which face you are currently editing is shown in the popup (Front / Back).