Preset Browse / Place
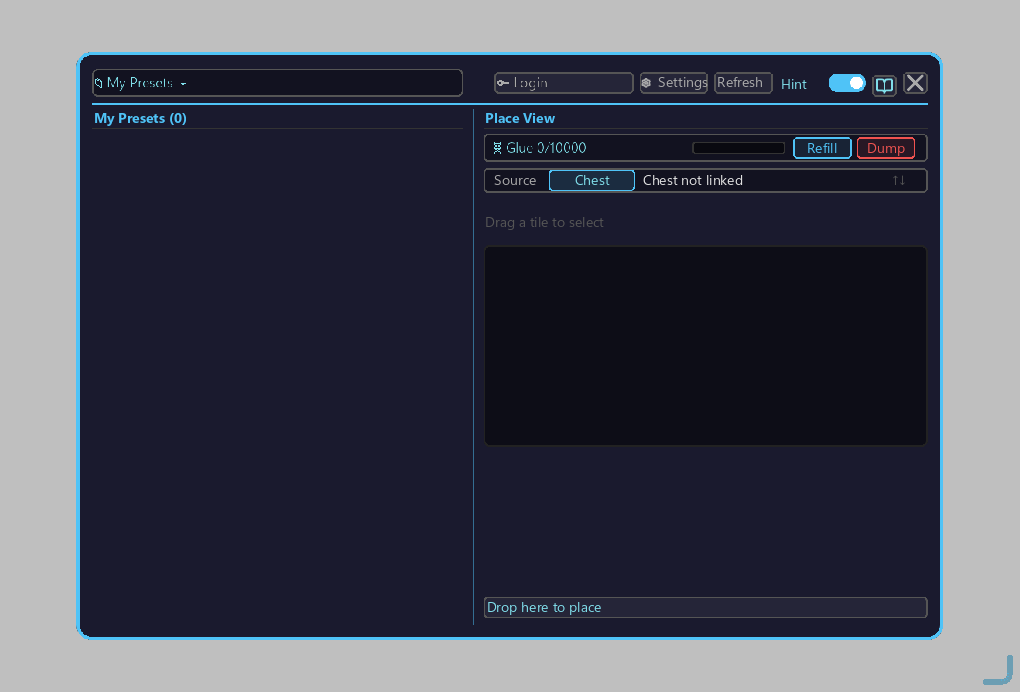
The main GUI of the Train Preset Tool for browsing / placing / uploading / deleting saved presets.
Opening / Holding
This screen is opened with the Train Preset Tool in GUI mode (the tool is in GUI mode right after you switch to it).
- Hold the Train Preset Tool.
- Right-click as-is (default: right mouse button). This screen opens.
- To close it, press Esc or left-click the "×" at the top right of the screen.
Mode switch (dropdown)
Left-click the mode indicator (dropdown) at the top of the screen to open the list, and left-click Mine / Place to switch.
| Mode | Content |
|---|---|
| Mine (yours) | Locally saved presets (= ones you saved) |
| Place (public) | Online presets downloadable from Preset Place |
Main operations
| Operation | Behavior |
|---|---|
| Left-click a tile | Select preset → 3D preview in right panel |
| Right-click a tile | Delete confirmation (Mine) |
| Drag & drop a tile to the right panel | Prepare placement. Preview and required materials appear with "▶ Proceed / ✖ Cancel" buttons |
| Left-click "▶ Proceed" | Confirm placement. This screen closes and the tool switches to Place mode |
| Left-click the refresh button | Reload the list |
| Left-click the upload icon | Upload to Preset Place (upload) |
3D preview
The right panel shows the selected preset in 3D. Operate the mouse over the preview:
- Left drag: rotate
- Right drag: pan
- Mouse wheel: zoom
Search (Place mode)
Search public presets by name. Left-click the search field at the top, type a name, and combine it with the sorts below to narrow down:
- Created date / likes / downloads
Materials display
Lists the blocks / items required by the selected preset. Shortfalls are shown in red, sufficient amounts in green. Details: Material Refill.
Material source
Switch where the required materials are pulled from by scrolling the mouse wheel over the material-source pill button in the right panel:
| Source | Behavior |
|---|---|
| Chest | Auto-pull from the linked chest |
| ME | Pull from the AE2 network |
Glue tank
The amount of Create Super Glue (adhesive) required at placement time is shown here.
- Left-click the `Refill` button → the Material Refill screen opens, where you can refill the tank with slime balls, etc.
- Left-click the `Dump` button → discards all of the tank contents.
Placement flow
Confirming with "▶ Proceed" closes the GUI and switches the tool to Place mode. Then place it in the world:
- Right-click the track position where you want the train (default: right mouse button) to set the origin.
- Alt + wheel rotates the orientation in 90° steps (as needed).
- Right-click again to execute placement. Materials and adhesive are consumed here.
- If placement fails and can be retried, middle-click to retry, or Shift + middle-click to cancel Place mode and return to GUI mode.